Bill said:Thanks Bill for your contribution to MFM
Things you need to do to build a two valve, performance improved head, Teksid block modular Ford V8. This article will focus on the more budget minded, naturally aspirated build, but will also offer suggestions and options for adding performance potential to the build. It is not the author’s intention to create an exhaustive “how-to” on building a 4.6L modular engine. There are plenty of technical manuals already published that give that information in great detail. We recommend that you purchase the appropriate shop level manuals that will help you ensure attention to detail. The build will take you through a complete pan to intake engine, and will touch on some of the peripheral accessories and drives. The author assumes that the reader has a sufficient mechanical aptitude to perform and standard overhaul on a Ford modular V8. This is simply an extension of that skill. Think of this as a poor man’s Aluminator. It is our opinion that this long block engine can be built for under $1500 net, using mostly salvage yard parts and come close to 320 hp. By net, we mean that you should buy a complete Mark VIII engine and sell the parts you don’t need, buy a complete Mustang GT engine ’01-’04 and sell the parts you don’t need, sell whatever engine this build is replacing, watch for/ask for deals on parts you do need on the forum sites and places like eBay and Craig’s List. If you are in a hurry, plan on spending twice that. A good rule of thumb on a build like this is to plan on spending between $7 and $12 per horsepower. For around $13 per hp, you can take this combo to well over 400 N/A hp and not have to change a thing but the tune when you are ready to add that power adder you’ve been drooling over for years. At the end of the article, we will discuss a scenario that will apply the technical information in this article.
Block
The Teksid block (F6LZ-6010-AB) was made from 1993 to 1998 and was available in the Lincoln Mark VIII and in the ’96-’98 Cobra (not an exhaustive list, just the easiest place to find them). While all the magazines will tout the fact that Teksid of Italy is a supplier to Ferrari, they seem to miss the fact that they are owned by Fiat and are one of the world’s largest foundry outfits. In 1999, Ford switched to the WAP (Windsor Aluminum Plant) block (XR3Z-6010-CA), which is only capable of about 600hp. Although it appears externally to be the stronger block, the WAP block has significantly less aluminum and was much cheaper for Ford to produce. The only advantage to the WAP block is that it is 20 pounds lighter than the Teksid block. While it is generally more expensive than the Teksid block, it is a viable alternative if availability and build plans match up. The Teksid block is capable of handling between 900 and 1200 hp (depending on who you ask) when properly prepared. There are a few out there that have seen 2000+ hp, but not in this configuration.
In order to run the performance improved two valve heads, there are a couple modifications you will/may need to make. There is a coolant passage required by the 2V engines that is not required by ’98 and older 4V engines. This can easily be remedied on the Teksid Block by drilling the passage. It is located on the driver’s side cylinder bank near the top front of the block. The hole is roughly 9/16” and you can use that size drill. First, lay a 2V head gasket down on the block and mark where the hole needs to be. Second, lightly center-punch the correct location for the hole. Drill a pilot hole before you drill your larger hole. Even though the block is aluminum, you don’t want to cause stress cracks or have drilling mistakes. Use a sharp drill bit and take your time. The WAP block already has this coolant passage, as it was included with the PI update to Tumble Port heads on the ’99 and newer 4V engines. The second modification to the block is relative to the age of the block and is the one you might have to make. In some of the older castings, the water pump boss on the driver’s side might have to be clearanced a bit. The boss may interfere slightly with the movement of the pivot arm on the timing chain tensioner on the inboard side. You can also notch the swing arm slightly to allow a cleaner installation. We recommend not doing anything until you bolt up the parts and see where/if it is going to hit.
Heads
The head configuration of the 2V ’99-’04 Mustang GT has a specific purpose for this build. The horsepower potential of Performance Improved heads is excellent and far superior to the pre-’99 heads. In addition, the parts cost is less than half of most 4V builds and gives you many more parts options, compression ratio options, etc. The ’99 and most of ’00 Mustang GTs had Windsor engines. The ’96 to ’98 and late ’00 through ’04s had Romeo engines. If you are salvage yard shopping or buying a parts car, this will make a difference. Also worth noting, now is the time to do porting and polishing if you ever plan to. The heads are off and should be professionally serviced. It isn’t an absolute must, but will pay dividends in the long run. At least let the machine shop install the new valve seals that will come with the overhaul kit you will have to buy.
Windsor heads have casting number XL3E for ’99 to ’01 and 2L1E for ’02 and later. They have press on cam sprockets and individual cam journal caps. While these heads are good to over 400 hp and will work on this type of build, they have longevity issues that make them far less desirable than their Romeo counterparts for any build. Since we are doing a 2V/Teksid build here, we will not be discussing the Windsor heads.
Romeo heads have Casting number 1L2E ’01 - ’04. These heads have bolt on cam sprockets for positive retention and cam journal bridging, much like a crank shaft main cap girdle, which adds rigidity. For the purposes of this build, these are the heads we will be referencing. There are other bonus features to using the Romeo heads that will become evident as we talk about some of the other parts necessary. These features are relative to the fact that the Teksid block most resembles the Romeo architecture.
For those of you who do not have the time or the desire to deal with salvage/used parts, there are a couple of options. Remanufactured Romeo PI heads are available from several of the large parts chains for about $750 a pair including new cams. If you budget is a bit larger or your need for hp is higher, there are aftermarket options like the Trick Flow Twisted Wedge heads. Trick flow makes a huge array of parts that would turn this combination into a real beast that would rival virtually anything on the street. The technology is impressive and they have packaged their products in a number of very attractive finishes that make a show quality appearance just a pressure wash away. It would also be relatively easy to throw the FRPP catalogue (and your credit card) at this combination to create impressive power. Just because this combination can be done on a tight budget doesn’t mean that it has to be. The point is that this combination is upgrade friendly long after you have it rumbling down the blacktop.
Other parts
Timing gears for the crank end; there are two basic types, the split or two piece gear set and the single or two in one gear. The single piece gear is what Ford went to in 2001 and is less prone to failure than the two piece OEM unit for obvious reasons. The part number for the two piece gear is XR3Z-6306-BA and is available through Ford if you don’t buy a complete donor engine or have a hard time finding it. There are also aftermarket gears available that can give you extra timing adjustability and true roller chains. Virtually all of the aftermarket gears are the two piece variety, but are made significantly stronger than the OEM units. Even the aftermarket replacement parts that are not necessarily performance oriented are mostly two piece parts with multiple keyways. This is a much better option than the one piece part, if you can work it into your budget. In ’91 and ’92 the 2V motors actually had a true roller chain set, but then Ford switched to the link type for ease of installation and reduction in noise. They also switched from plastic guides to nylon. We will discuss guides and tensioners at length later.
Timing cover; there are a lot of timing covers out there that will work marginally well, but the one to look for is F3AE-6C086-AE. It fits the Teksid block with Romeo 2V heads perfectly without making any modification. They call it a ‘94-’95 Thunderbird front cover on most forums, but it also was available on the same years Crown Victoria, Grand Marquis, Town Car and Cougar. The good news is that there are thousands of these things in the salvage yards. Don’t forget that a lot of stuff has to bolt up to this, so make sure you get all the bolts and small pieces.
Timing chain guides and tensioners are another area where there is a lot of confusion with many builders. There is a fixed and pivot guide for each side of the engine. Since you are using 2V heads, you have to use the 2V guides on the fixed side. They bolt right up with no issues. It is the hydraulic tensioner side that gives everyone the confusion. The problem is understanding the system. The guide that has the hydraulic tensioner floats on a pivot pin, which allows it to use oil pressure to push the guide arm. The tensioners are the same on both the 2V and 4V motors, so use what you have if they are in good shape. The pivot pins on the Teksid block are threaded and screw in. The ones on the Romeo 2V blocks were press in, so they will not work without modification. Also, the pin itself is a different outside diameter, so it won’t match up to the inside diameter of the 2V pivot arms. You can use a set from an Explorer (pins and pivot arms), but you may still have to do some minor clearance work. As mentioned in the block section, there are sometimes minor clearance issues, particularly on the driver’s side when using the 4V guides. The part numbers are YR3Z-6K282-AA for the pins and 1R3Z-6L253-AA (LH) and AB (RH). Since the issue is the clearance where the guide was made beefier, there is plenty of material for you to take off if you feel the need to split the difference between the block and swing arm. The good news is, you can get them for $20 new on ebay or $30 at the dealership, so don’t sweat this part too much, as it is one of the least expensive parts of the build. There are other ways to do it, like drilling a set of 2V pivot arms. This is one of the popular (budget oriented) ways to do this build. If you choose this route, you need to offset drill it to the thick side of the boss and then use a Drimel to clean up the edges of the bore on both sides. This eliminates the stress risers and will help prevent this part from ever failing. The diameter of the hole isn’t that much larger than the original, but attention to detail is important. Be sure to give yourself the .006 clearance the factory used to allow lubrication of the pivot point. Another option, if you have the tools, is the thread the 2V pin to match the block. I personally think this is one of the better options. Regardless of which option you choose, the chains need to ride reasonably squarely on the guides. If you get it installed and they are not lined up, you need to make them line up. Obviously, there are several options to make them line up from changing parts to using shims. Most of the Ford dealers will try to sell you a new set of Explorer pins and arms, and that isn’t a bad way to go.
Intake manifolds for this application are available in a couple of different configuration. Probably the most desirable and the most expensive of the OEM units is the ’01 Bullitt intake.


Some of you may note that this manifold is very similar to the Mark VIII manifold with a Trick Flow elbow. It is an amazing similarity in fact (read virtually identical). While this is an awesome factory piece, it is pricey (NOS is $1000 and used is $450 plus) and getting hard to come by. It also requires additional considerations for some of the sensors and the throttle cable, which is no longer available from Ford. TFS makes a very similar manifold to this unit and will give you some additional options.
This TFS manifold actually lets you run the Cobra twin 57mm TB and moves the operating range past 7000 rpm
In terms of normal factory parts, the regular Mustang GT intake manifold with the aluminum crossover will be a really viable option and will support around 400 hp N/A with the right bolt on aftermarket parts on this type of engine. There are a number of companies that make “power elbows” or plenums. C&L Performance makes a nice unit for the GT. It works really well and gives your dyno shop a lot to work with. It also give you room for porting and polishing for later upgrades like a supercharger if you choose to stick with the stock style intake.
This picture was downloaded from the Ranger Station (my picture sucked) Above is the C&L complete setup
Be sure you get a manifold with an aluminum crossover, as this was the fix for a Ford recall that had a limited duration. There are a lot of the all-plastic manifolds left out there, and they tend to crack, which is why Ford recalled them. The bad news is that Ford did the recall as part of a class action settlement and only offered the replacements for 90 days. You can get a new one with aluminum crossover for under $200 and add an aftermarket plenum, so this is not a bad option. It will also respond to a bit of port and polish work. On a technical note, these manifolds aren’t actually plastic. They are DuPont Zytel nylon composite and will respond as well to porting and polishing as if they were aluminum.
There are some sheet metal and fabricated aluminum manifolds out there, as well as some other aftermarket units that will allow you to adjust your hp/torque curve to match your needs. There are also some really nice forced induction options available for this setup.
Oil system parts; duties are handled by the Cobra oil pump and a pickup to match the pan you choose. For many applications, you don’t really need the extra oil the Cobra pump provides, but it only costs about 1 hp and is cheap insurance. It also helps keep your top end at an acceptable temperature. You can use just about any oil pan that fits your chassis, but the Cobra setup lets you run the windage tray and scraper that came on the Cobras. They are also baffled to assist with oil control under intense driving conditions. If you are planning to run the Cobra crankshaft, the Cobra pan or an aftermarket equivalent is required for counter weight clearance.
As a side note on the oiling system, depending on your chassis, plan on running a remote mounted oil filter with an oil thermostat and larger oil cooler. Because these engines have so much aluminum, you don’t want to let them get hot by accident. Think of it as if a hole in the radiator equals a hole in the block. Using the oiling system to help keep the engine cool will ultimately allow your aluminum 2V to live a long and powerful life.
Crank trigger; there are two types of crank trigger wheels; the stamped kind like the Cobras have and the cast kind that came on GTs. I think this part is a function of price and availability. All things being equal, the Cobra part is the better part. There are also aftermarket options for this, but they don’t add much value until you start getting into the much higher performance levels.
Crank shafts for this build come in two basic types. The nodular iron crank that came in the Mustang GTs and the Lincoln Mark VIIIs is easily identified by the 6 bolt setup used to hole the flywheel on. This is the most common type and can handle 400 to 500 hp. We have all seen people push 700+hp through these cranks, be they are living on borrowed time at that level. They also lower the survivable rpm limit of the build. The second type of crank is the forged Cobra crank. These can be identified by the 8 bolts used to hold the flywheel on. The balance weights are also different on this crank, so it is not compatible with the Thunderbird/Cougar oil pans. The forged architecture of these cranks make them ideal for builds that will continue to be pushed for more hp. These cranks can be balanced to spin at the 9,000 to 10,000 rpm range if desired. This makes them desirable to the turbo and nitrous crowd. Drag racers may note that a motor that can make power at they rpm will allow them to change their gearing.
Connecting rods
There are 3 basic types of connecting rods available for this build, 03/04 Cobra (or aftermarket), Windsor GT and Romeo GT. Ford used cracked powdered metal rods in the GTs and the non-supercharged Cobras. This means that the rod cap is unique to the rod it was broken off of. In the 03/04 Cobra, Ford used forged rods. If you happen to have the budget for forged internals, they are always the best option. If are on a tight budget and/or plan to stay at or below the 400hp level, the GT rods are a fine for the build. The difference between the Windsor and Romeo rods is the wrist pins. The Windsor rods have full floating pins, while the Romeo rods have press in pins. There are volumes of opinion and commentary available on the net about the merits and draw backs of each. This will be touched on in the piston section.
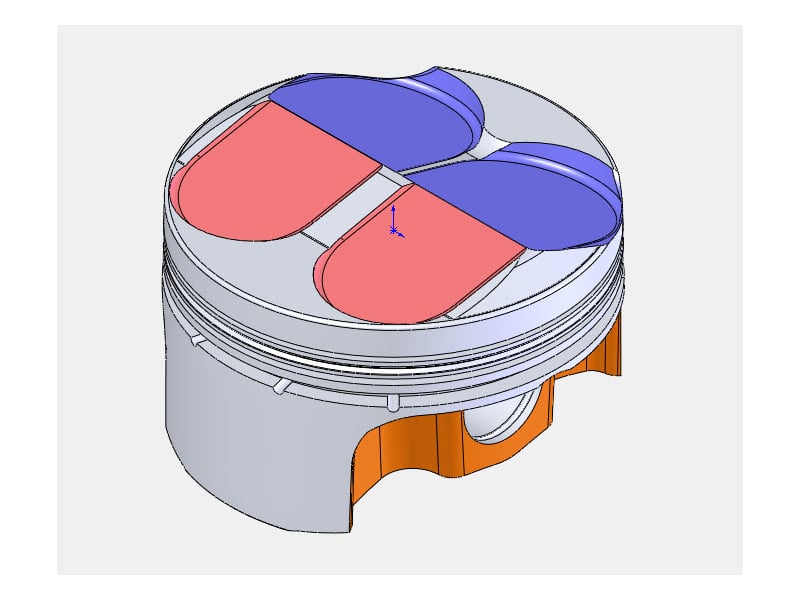
Pistons
There are 5 types of used or replacement pistons that are likely to be viable for a budget build. They each have characteristics that make them appropriate for specific types of builds. The primary difference in most cases is their dish volumes or construction architecture. Different volumes combine with the 2V heads to create different compression rations. Choosing the right combination for you specific build will mean the difference between a 100,000 mile capable performance street engine and the single season track engine that gets rings, bearings and gaskets every winter. Regardless of which piston set you choose, you should consider getting the reciprocating assembly professionally serviced and balanced. If you are going to run high compression or be above 350 hp, consider this a requirement and budget for it.
1. PI pistons have 18cc dish tops and will yield a roughly stock 9.8:1 compression ratio and will not need to be fly cut, assuming the use of a stock GT PI cam. Romeo pistons use press in wrist pins. They can survive a bit more of a beating than the Windsor pistons. So if you have power adder aspirations for a street driven car, this might be the right choice for you.
2. PI pistons for the Windsor engines are slightly different than their Romeo counterparts. When Ford put the Windsor engine in the ’99 and ’00 GTs, they saw fit to give you full floating wrist pins. Since the engine doesn’t really care if the piston was designed for a Windsor or Romeo, these are a viable option, particularly if longevity and weight reduction are paramount. Most builders will agree that they absolutely don’t add any hp or torque to the build by themselves. Some builders believe that they allow the engine to spin up a bit faster, which changes the ramp on the dyno curve. Others have said they will allow you to get an extra few rpms out of the same build. The theory is sound, but this will likely boil down to a budget/availability choice.
3. Non-PI piston have 11cc dish tops and will yield around 10.5:1 compression ratio and will also not require being fly cut assuming a stock GT cam. You will likely have a difficult time getting this past a sniff test, if that is required where you drive, but this compression ratio is very streetable on premium fuel.
4. Pistons from the Mark VIII will yield an 11.8:1 with 3cc dish design. These will require machining to safely clear the valves. If you are building a track only car, this is not a bad way to go. If you don’t want to have to feed your beast a steady diet of octane booster, this may not be for you. If you are looking for budget hp, this is it.
5. The last type of non-aftermarket pistons you are likely to consider is the Terminator forged pistons. Like any other 4V piston, they will yield a high compression ratio and will need to be fly cut. The biggest benefit to these is the fact that they can survive a great deal more hp than the others. These tend to be a bit pricey even used, so unless you plan to be north of 500 hp or get a smokin’ deal on a set, consider something else or consider aftermarket pistons.
Cam shafts
I’d like to tell you there are only a couple of types of cams in the salvage yards, but the bottom line is that you need to know what your cams came out of. Unless you are going with an aftermarket cam set, stick to the two types that came in the Mustang, NPI and PI. The NPI cams from 1991-'98 had .482-inch valve lift and duration of 204/208 degrees intake/exhaust. The PI cams .535-inch intake valve lift and .505-inch exhaust lift. Durations was reduced to 192 degrees on the intake side and 184 degrees for the exhaust valves. The PI cams helped Ford bump the hp to 260 and the torque up over 300, so they are definitely the way to go for a budget build. What I don’t like about any of the factory cams is their construction architecture. They are made from lots of little piece and not welded together. They are not a machined blank like the older cams or the current aftermarket offerings. This design allow Ford to save some rotating mass, but it also means they don’t survive well during high rpm usage. The aftermarket has some really impressive cams for the PI build. If you can work it into your budget, this is the way to go.
Scenario
Okay, so you’ve decided that you’re going to do this build. You have a 2003 Mustang GT that you do a little autocross, a little open track and a little drag racing in. You’ve been adding bolt on upgrades for a several years, but the car still needed to be available for daily driver status, so you could have it down for winter project. Now that it is no longer you sole source of transportation, you want to take around 80+ pounds off of the front end and increase your horse power at the same time. You’re not looking to make a 800hp monster, but 320 to 400 at the rear wheels could really come in handy. You also don’t want to have to replace a bunch of stuff you already bought and you don’t want to break the bank. So you decide to do the aluminum block upgrade with a little extra stuff, but where do you start.
1. Always start by cashing a reality check. You need to ask yourself the hard questions. Do I have a place to do this kind of work? Can the car be down for the amount of time it might take me to do this project? Do I have the funds to get all the little stuff I am likely to need? Do I have the tools necessary to do this kind of project? Do I have the skills and patience to do this kind of work? Will my wife understand what I’m doing and be supportive? Do I have or need a backup plan in case I get in over my head? Assuming that the answers to all of these questions were positive, we can move on to step two.
Step two is the build plan. The better you plan a project the more likely it is to succeed. Create a parts list so you can start gathering parts. Since this build will represent a major overhaul, you will need all the parts that normally come in a very complete overhaul kit. That will run you about $500 by the time you get all the gaskets and seals, rings and bearings. You need a good block, so you look around and find that you can buy a complete Mark VIII engine for about the same price as you can buy the bare block. Let’s call it $450 since I recently sold one for that. You disassemble the engine and send the block and crank to the machine shop to be checked and serviced. Assuming all they need is cleanup (tank the block, hone and ridge cut the cylinders, install new freeze plugs, check and polish the crank); we’ll call it $250. While that is being done, you clean up and sell the rest of the parts from the 4V motor. That should net you at least $200. That should cover the cost of the front cover, the pivot pins and the explorer pivot arms. In theory, you should have everything you need to do this build and only be $1,200 in to it. There always seems to be miscellaneous stuff that you find or break when doing a build like this. Belts, hoses, motor mounts other small parts can add up fast, and should be budgeted for. Our scenario budget was $1500 pan to intake. If you need valve guide work, heads surfaced, crank turned, or other machine work, it could eat that up in a hurry. If you have decided to go the higher compression route, you will need to have the pistons machined, which usually runs around $20 each. Machine work is one of the more important choices you make during this build, as it will be difficult to have the reciprocating assembly balanced once the build is done. This is a very doable build and will wake up a New Edge GT like taking a fat woman off the hood. Putting this engine in a ’96-’98 GT will be night and day from what you had before.


") Thanks for cashing a reality check for me. I should have been much more detailed about how the different parts interact.
Thanks for cashing a reality check for me. I should have been much more detailed about how the different parts interact.